Brother Lock 1034D Manual: A Comprehensive Guide
This manual provides detailed instructions for the Brother Lock 1034D, covering setup, threading, maintenance, troubleshooting, and advanced techniques for optimal performance.
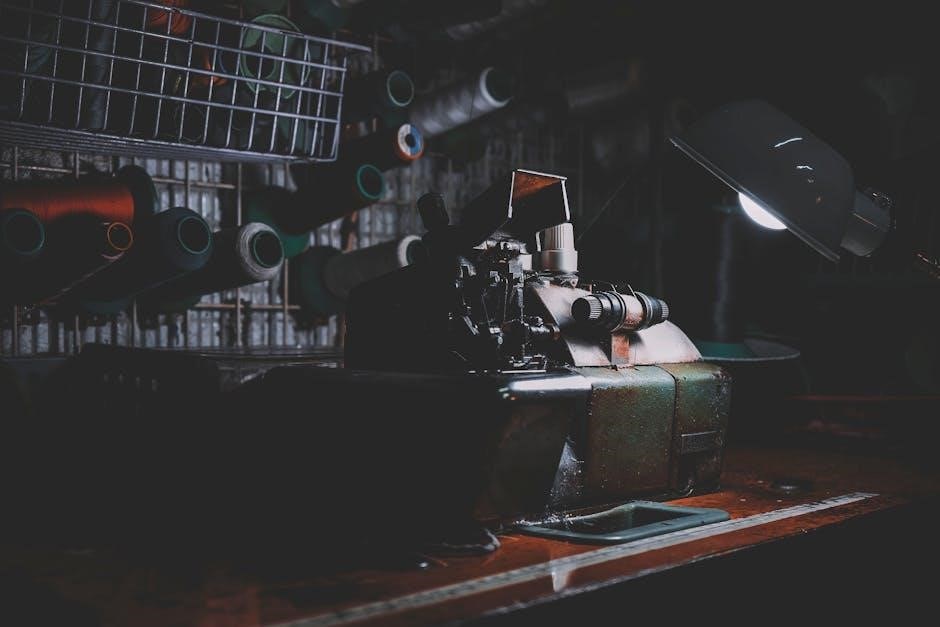
The Brother Lock 1034D is a high-speed, industrial overlock machine renowned for its durability and precision. This manual serves as a comprehensive resource for both beginner and experienced users. It details everything from initial setup and threading procedures, utilizing genuine Brother parts for optimal function, to advanced stitching techniques like rolled hems and flatlocks.
Understanding this guide ensures proper operation, preventative maintenance – including cleaning and oiling – and effective troubleshooting for common issues like thread breakage or skipped stitches. Access downloadable PDF versions and support resources for a seamless experience.
Key Features and Specifications
The Brother Lock 1034D boasts a high-speed capability, ideal for efficient sewing of various fabrics. Key features include adjustable stitch length and width, differential feed for preventing puckering, and a robust construction ensuring long-term reliability. It utilizes standard needles and is compatible with a range of thread types.
Specifications include a maximum sewing speed, adjustable presser foot pressure, and a convenient built-in trimming mechanism. The machine’s design prioritizes ease of threading and maintenance, supported by readily available parts and detailed documentation.
Setting Up Your Brother Lock 1034D
Proper setup involves carefully unboxing the machine, inspecting all components, and connecting the power cord before initial use for optimal function.
Unboxing and Initial Inspection
Carefully unpack your Brother Lock 1034D, ensuring all included accessories are present. These typically include a screwdriver, pincet, needle assortment, cleaning brush, spool caps, and potentially an instructional DVD. Inspect the machine for any shipping damage – dents, scratches, or loose parts. Verify the presence of the main power cord and foot controller. Retain the original packaging for potential future transport or warranty claims. A quick visual check confirms everything is accounted for before proceeding to power-on and initial setup, guaranteeing a smooth start.
Powering On and Basic Controls
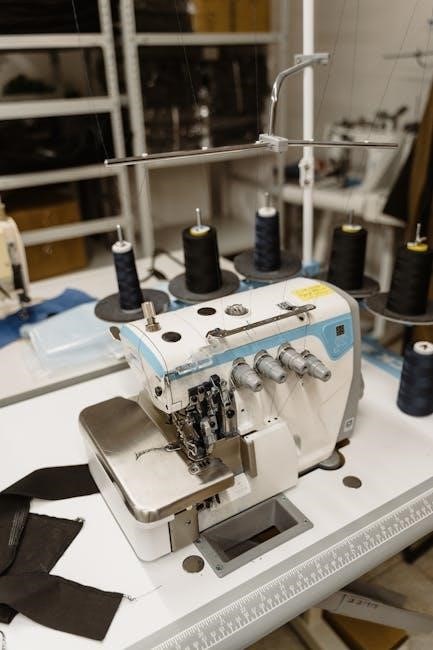
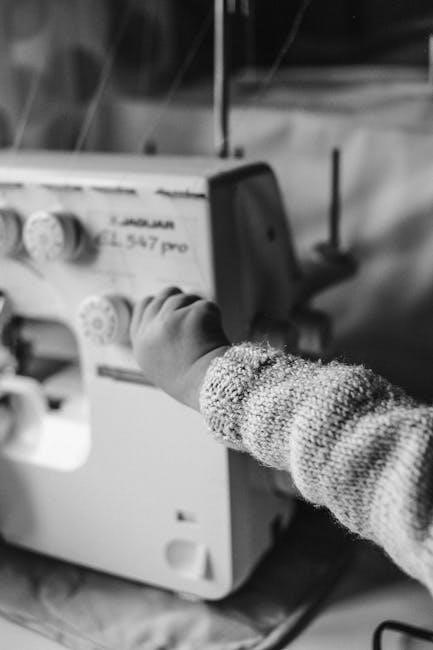
Connect the power cord to the machine and a suitable outlet. Ensure the power switch is in the ‘off’ position before plugging in. The foot controller connects to the designated port on the machine. Power on using the main switch; the machine will initiate a self-check. Familiarize yourself with basic controls: the power switch, foot pedal for speed control, stitch length dial, and differential feed adjustment knobs. Understand the function of each before operation. Refer to the machine diagram in the manual for precise control locations.

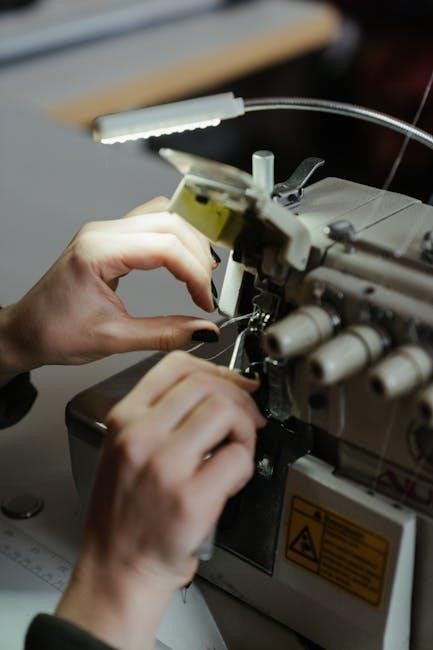
Threading the Brother Lock 1034D
Proper threading is crucial for optimal performance; this section details the precise steps for threading the upper and lower loopers, and the needle correctly.
Upper Looper Threading Guide
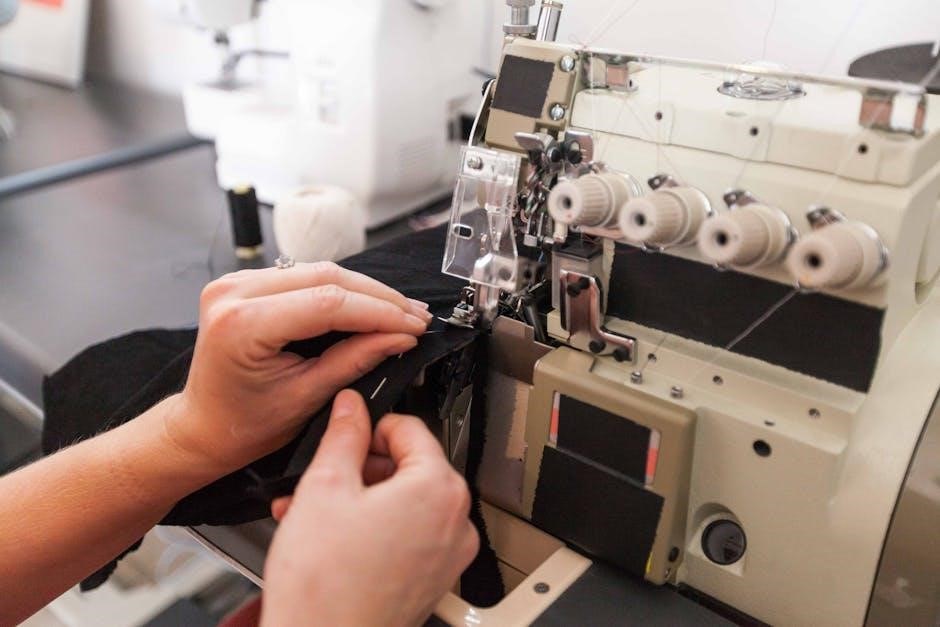
Successfully threading the upper looper requires careful attention to detail. Begin by raising the presser foot and ensuring the machine is powered off. Guide the thread through the tension disc, then down through the thread guide positioned above the looper. Next, pass the thread under the upper looper, and finally, through the looper’s eye. A small amount of thread should be left trailing. Correct tension is vital; adjust if needed for smooth looping. Refer to diagrams in the full manual (PDF available online) for visual assistance. Incorrect threading leads to skipped stitches or poor loop formation.
Lower Looper Threading Guide
Threading the lower looper demands precision for proper stitch formation. Start by raising the presser foot. Direct the thread through the designated tension unit, then carefully follow the path indicated by the threading guide. Ensure the thread passes behind the needle plate and then up through the lower looper’s eye. Pull a sufficient length of thread through – approximately 3-4 inches. Proper tension adjustment is crucial; consult the manual’s PDF version for detailed diagrams and troubleshooting tips. Incorrect threading will result in looping issues and inconsistent stitch quality.
Needle Threading Instructions
Needle threading on the Brother Lock 1034D requires a specific sequence. Begin by raising the needle to its highest position using the handwheel. Thread the needle from front to back, utilizing the needle threader if needed – a pinset is also helpful. Ensure the thread is securely inserted into the needle’s eye. Pull approximately 3-4 inches of thread through. Then, guide the thread down through the designated path, ensuring it engages with the upper and lower looper threads correctly. Refer to the downloadable PDF manual for visual aids and detailed steps.

Adjusting Stitch Settings
Fine-tune your stitches by adjusting length, width, and differential feed. These controls allow customization for various fabrics and desired seam finishes on the 1034D.
Stitch Length Adjustment
The stitch length dial on your Brother Lock 1034D directly controls the length of each stitch formed. A shorter stitch length, indicated by lower numbers, creates a denser, more secure seam – ideal for lightweight or delicate fabrics. Conversely, increasing the stitch length, using higher numbers on the dial, produces looser stitches suitable for heavier materials or when a more flexible seam is required.
Experimentation is key! Always test stitch length on a scrap piece of your chosen fabric before beginning your project. Proper stitch length ensures fabric integrity and a professional finish. Refer to the manual’s diagrams for precise dial settings corresponding to different fabric types.
Stitch Width Adjustment
Adjusting stitch width on the Brother Lock 1034D controls how much the needle swings from side to side, impacting the seam’s overall coverage and appearance. A narrower stitch width creates a more concentrated seam, excellent for reinforcing edges or creating decorative effects. Widening the stitch provides broader coverage, suitable for preventing fabric fraying or achieving a more substantial finish.
The width adjustment dial allows precise control. Test different settings on scrap fabric to determine the optimal width for your project and material. Incorrect width can cause puckering or uneven seams, so careful adjustment is crucial for professional results.
Differential Feed Adjustment
Differential feed is a key feature of the Brother Lock 1034D, controlling the speed at which fabric is fed through the machine, impacting stretch and gathers. A setting greater than ‘1’ stretches the fabric, ideal for lettuce edges or decorative effects on knit fabrics. Conversely, a setting less than ‘1’ reduces fabric feed, preventing stretching and ensuring flat seams on woven materials.
Experiment with adjustments on scrap fabric. Incorrect settings can cause wavy seams or puckering. Proper differential feed ensures even stitching and professional-looking results, especially when working with challenging fabrics.
Performing Basic Maintenance
Regular maintenance—cleaning, oiling, and needle replacement—ensures your Brother Lock 1034D operates smoothly and reliably, extending its lifespan significantly.
Cleaning the Machine
Consistent cleaning is vital for maintaining peak performance of your Brother Lock 1034D. Begin by disconnecting the power. Use the provided brush to remove lint and debris from all areas, including the looper area, needle plate, and feed dogs. A soft cloth lightly dampened with a cleaning solvent can remove stubborn residue. Avoid using compressed air, as it can push debris further inside. Pay close attention to oil buildup, as it attracts lint. Regularly cleaning prevents jams, skipped stitches, and ensures smooth operation, prolonging the machine’s life. Always re-oil after cleaning!
Oiling the Machine
Proper lubrication is crucial for the Brother Lock 1034D’s longevity. Disconnect the power before oiling. Apply a few drops of high-quality sewing machine oil to the oiling points – typically located around the looper shafts, needle bar, and feed mechanism. Avoid over-oiling, as excess oil attracts lint. After oiling, manually turn the handwheel several times to distribute the oil evenly. Wipe away any excess oil with a clean cloth. Regular oiling (after every few hours of use) ensures smooth operation, reduces friction, and prevents wear and tear on vital components.
Needle Replacement Procedure
To replace the needle on your Brother Lock 1034D, first, ensure the machine is powered off. Loosen the needle clamp screw using the provided screwdriver. Gently remove the old needle, noting its orientation. Insert a new, compatible needle (refer to the manual for correct type) with the flat side facing the correct direction. Tighten the needle clamp screw securely, but avoid over-tightening. A properly installed needle is essential for optimal stitch quality and preventing damage to the machine or fabric. Always use genuine Brother needles.
Troubleshooting Common Issues
This section addresses frequent problems like thread breakage, skipped stitches, and looper malfunctions, offering clear solutions for a smooth sewing experience.
Thread Breakage Problems
Frequent thread breakage on the Brother Lock 1034D often indicates improper threading, incorrect tension settings, or using unsuitable thread for the fabric. Ensure the thread path is clear and free of obstructions, carefully following the threading guide. Verify that the tension dials are appropriately adjusted for the thread weight and fabric type. Consider using genuine Brother thread or a high-quality alternative. Inspect the needle for damage or burrs, replacing it if necessary. Finally, confirm the looper area is clean and free from lint accumulation, as this can cause friction and breakage.
Skipped Stitch Solutions
Skipped stitches on your Brother Lock 1034D can stem from several issues. First, ensure the needle is correctly inserted and of the appropriate type and size for your fabric. Second, verify the needle is not bent or damaged; replace it if needed. Check the looper blades for sharpness and proper alignment – dull blades cause skips. Adjust the presser foot pressure; too little pressure can lead to fabric lifting. Finally, confirm correct threading and tension settings, as imbalances frequently cause skipped stitches.
Looper Issues and Fixes
Looper problems on the Brother Lock 1034D often involve timing or blade sharpness. If the looper isn’t catching the needle thread, check the looper timing – this may require professional adjustment. Dull looper blades cause poor stitch formation and skipped stitches; replace them as a set. Ensure the looper is correctly threaded, following the diagram in the manual precisely. Inspect for lint buildup around the looper area, as this can hinder smooth operation. Regular cleaning and oiling are crucial for looper health.
Advanced Techniques
Explore rolled hem and flatlock stitching with your Brother Lock 1034D, adapting settings for diverse fabrics to unlock creative serging possibilities.
Rolled Hem Stitching
Achieving a delicate rolled hem on the Brother Lock 1034D requires specific adjustments. Begin by installing the rolled hem foot, ensuring it’s securely attached. Lower the stitch finger and adjust the lower looper tension for a neatly rolled edge. Experiment with differential feed settings; a lower feed ratio generally works best to prevent puckering. Carefully test on scrap fabric, gradually refining tension and feed until a consistent, narrow rolled hem is achieved. Remember to use a fine needle appropriate for your fabric weight. Practice makes perfect!
Flatlock Stitching
The Brother Lock 1034D excels at creating professional flatlock seams, ideal for sportswear and activewear. Utilize the flatlock foot and adjust the stitch length to approximately 2.5-3mm. Slightly loosen the lower looper tension and increase the differential feed to encourage fabric separation. Precise tension balance is crucial; test on scraps to avoid puckering or uneven seams. Ensure consistent fabric feeding by guiding the material gently. Flatlock stitching provides a strong, flexible seam with a distinctive, modern appearance, perfect for projects demanding both durability and comfort.
Using Different Types of Fabric
The Brother Lock 1034D handles a wide range of fabrics, but adjustments are key. For stretch fabrics like knits, reduce presser foot pressure and increase differential feed. Woven fabrics may require increased tension and a standard presser foot. Always test on scraps first! Delicate fabrics benefit from a finer needle and reduced thread tension. Heavier fabrics may necessitate a needle upgrade and increased stitch length. Consistent testing ensures optimal stitch quality and prevents damage to both the fabric and the machine, maximizing versatility.
Safety Precautions
Always disconnect the power before maintenance. Keep fingers clear of moving parts. Use genuine Brother accessories for safe operation and prevent potential hazards.
General Safety Guidelines
Prioritize safety when operating the Brother Lock 1034D. Always disconnect the power cord before performing any maintenance, including needle replacement or cleaning. Keep fingers, hair, and loose clothing away from moving parts during operation to prevent injury. Never operate the machine if it’s damaged or malfunctioning.
Ensure the machine is placed on a stable, level surface. Do not use outdoors or in damp environments. Supervise children when near the machine. Use only approved accessories and attachments. Regularly inspect the power cord for damage, and if found, discontinue use immediately. Following these guidelines ensures a safe sewing experience.
Electrical Safety Information
To ensure electrical safety with your Brother Lock 1034D, always verify the power supply matches the machine’s requirements. Never operate the machine with a damaged power cord or plug. Avoid using extension cords if possible; if necessary, use a heavy-duty cord rated for the machine’s amperage.
Do not expose the machine to water or excessive moisture. Disconnect the power before cleaning or performing maintenance. Avoid touching the plug with wet hands. If the machine malfunctions electrically, immediately disconnect it and contact Brother support for assistance. Proper grounding is essential for safe operation.

Resources and Support
Access the Brother Lock 1034D manual in PDF format online, find replacement parts easily, and connect with Brother’s support team for assistance.
Downloading the Manual (PDF)
Obtain the comprehensive Brother Lock 1034D manual in a convenient PDF format for easy access and offline viewing. Several online resources offer downloadable versions, including direct links and file-sharing platforms like Depositfiles. The manual, spanning approximately 35 pages and weighing 20.52MB, details every aspect of the machine.
Ensure a stable internet connection during the download process. You can also find a smaller, 1.11MB booklet version. Having the PDF readily available allows for quick reference during setup, threading, maintenance, and troubleshooting, maximizing your sewing experience.
Finding Replacement Parts
Sourcing genuine Brother replacement parts is crucial for maintaining the performance and longevity of your Lock 1034D. While specific part lists aren’t detailed in the provided text, Brother strongly recommends using only authentic Brother components. This ensures compatibility and prevents potential damage caused by non-approved alternatives.
Explore Brother’s official website or authorized dealer networks to locate necessary parts like needles, loopers, or belts. A parts reference guide, containing 15 pages, may also be available to aid identification. Prioritize genuine parts for optimal machine functionality.
Brother Support Contact Information
For direct assistance with your Brother Lock 1034D, reaching out to Brother Support is recommended. While specific contact details aren’t explicitly provided in the given information, Brother offers support channels for their products. Accessing their official website is the best starting point to find phone numbers, email addresses, or live chat options.
Support is generally available Monday through Saturday from 9 AM to 9 PM, and Sundays from 10 AM to 9 PM. Utilizing these resources ensures you receive expert guidance for any questions or concerns regarding your sewing machine.
Leave a Reply
You must be logged in to post a comment.